Onboarding Process

The onboarding process lets you create your WellPrept account in an organized and effective way. It provides you with easy-to-use options that enable you to highlight your practice and all the essential details of your clinic so that patients can reach out to you whenever needed.
IN THIS ARTICLE
Sign Up/Create an Account on WellPrept
To use WellPrept and enhance your clinic day, you need to create an account.
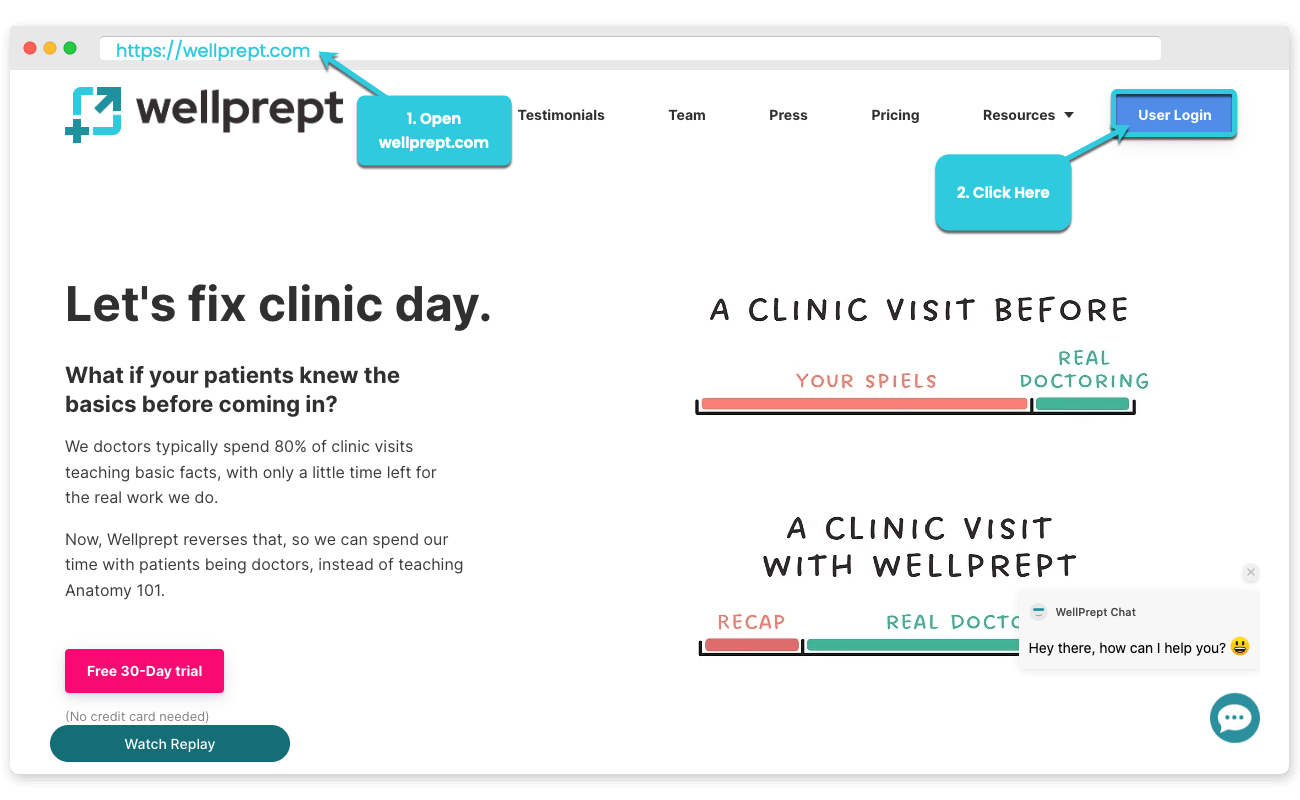
Visit the following website:
https://wellprept.com/ ↗️ and click on the User Login button.
And it will take you to the login window that you can also access directly using the URL: https://app.wellprept.com/ ↗️
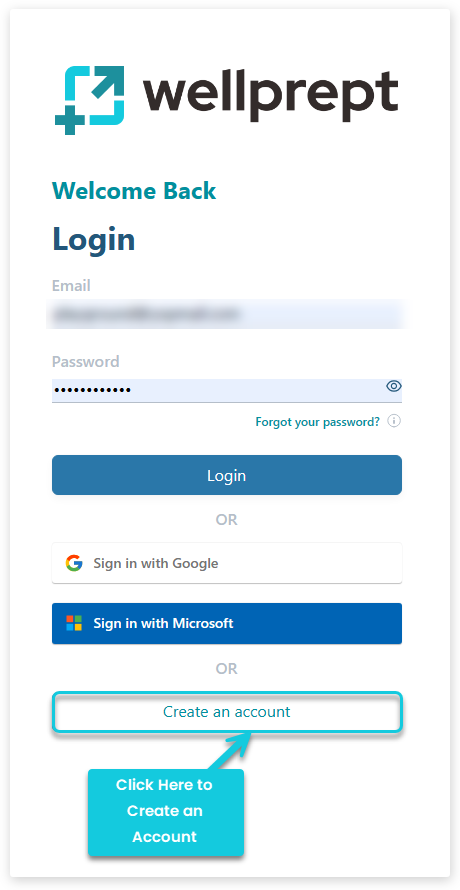
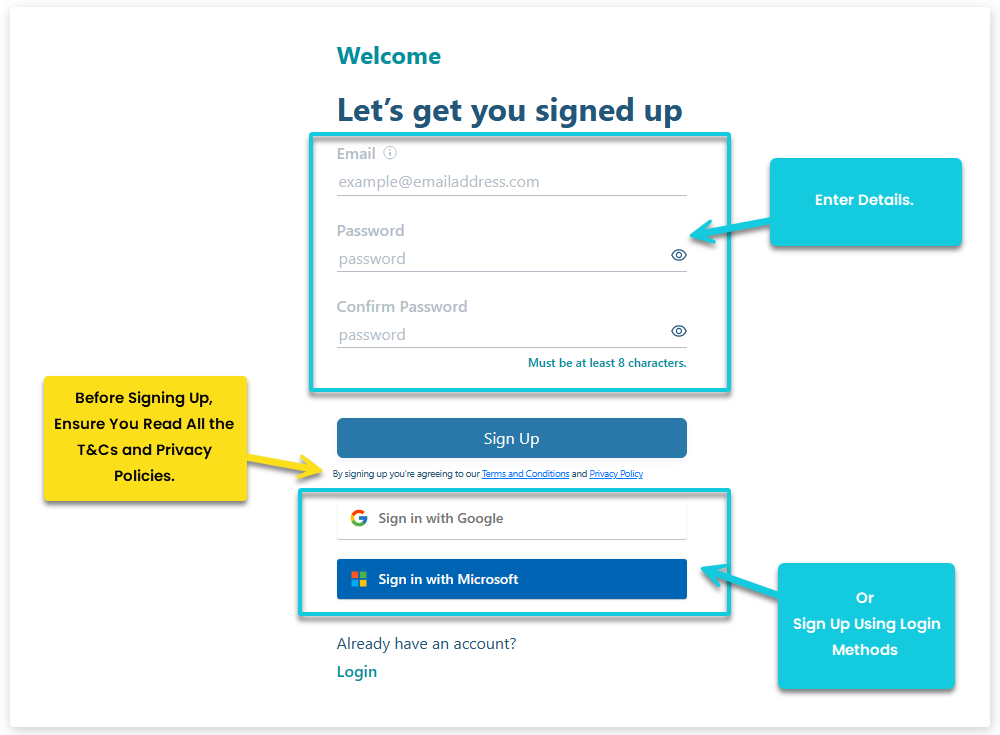
You will then need to enter your details to sign up. Alternatively, you can use the pre-defined login methods to finish signing up quickly.
Once you've completed the sign-up, the onboarding process will start. Follow the instructions in the next section of this article to complete the onboarding process of WellPrept.
Before signing up for the WellPrept platform, please visit our Terms and Conditions and Privacy Policy pages and read through all the points. Creating an account simply means you agree to our T&Cs and Privacy Policies.
Follow the Onboarding Process
You can watch the video, or if you prefer the text instructions, then continue with the following steps.
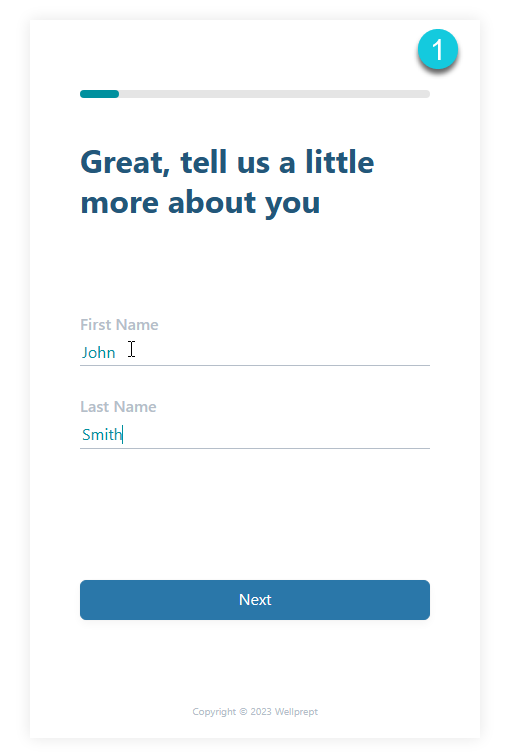
The Onboarding Process will start with (Step 1) asking for basic details such as your name. Add your details and then click on the Next button.
The 2nd step will ask you to enter details about where you are located.
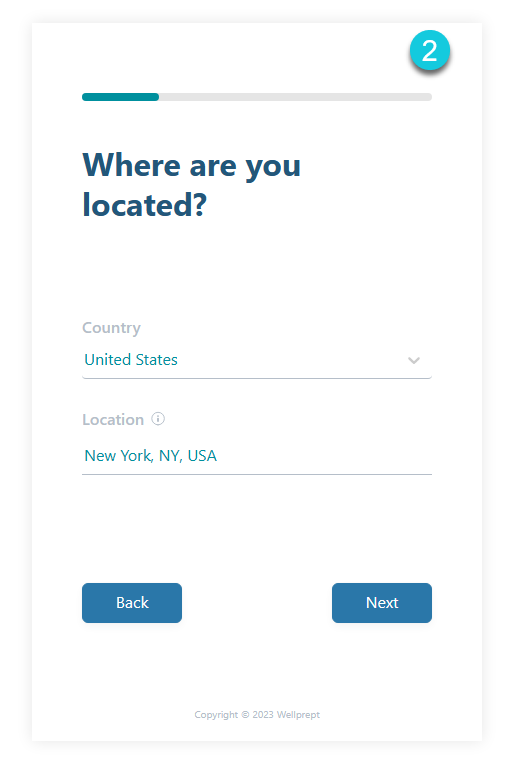
First, select your country from the dropdown menu and then enter your city. Then, click on the Next button.
Occasionally, users from outside the US will run into problems. If this happens, please contact us at help@wellprept.com
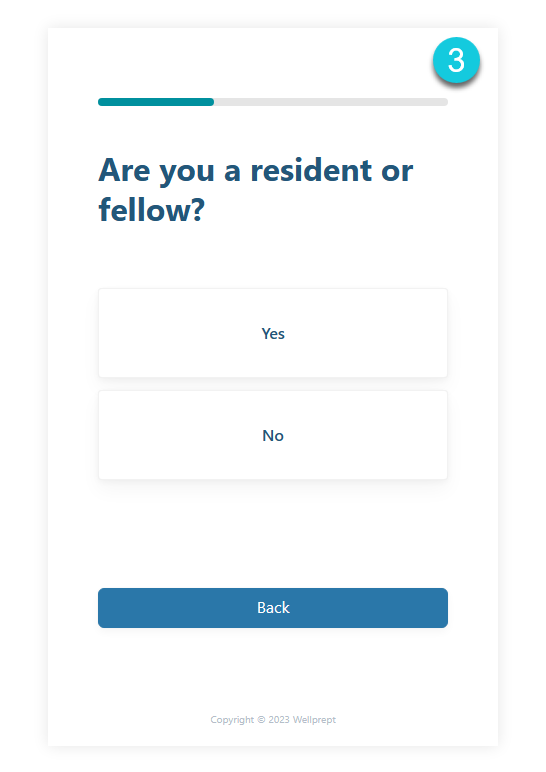
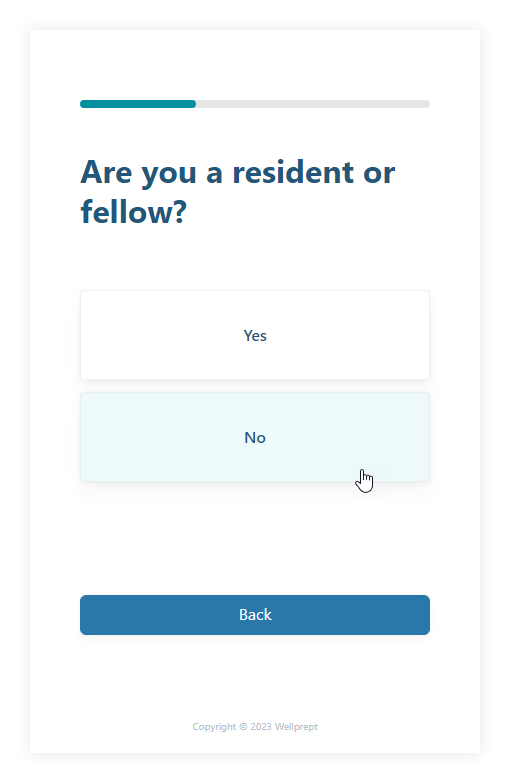
3rd step will require you to define your practice/training status. If you're under a residency or fellowship training program, select Yes. Otherwise, click No.
Onboarding as a Resident/Fellow
If you are not a resident/fellow, click here 👉 Onboarding as an MD to continue with the onboarding process.
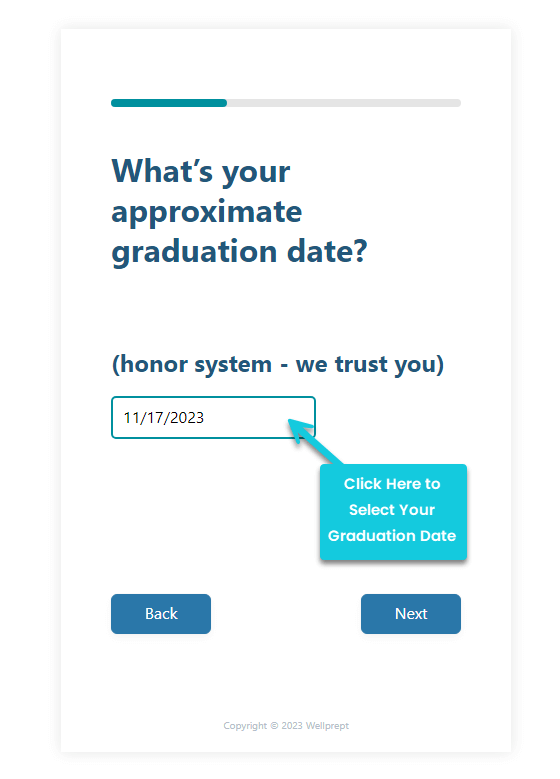
When you select Yes, you will be prompted to choose your residency/fellowship training graduation date.
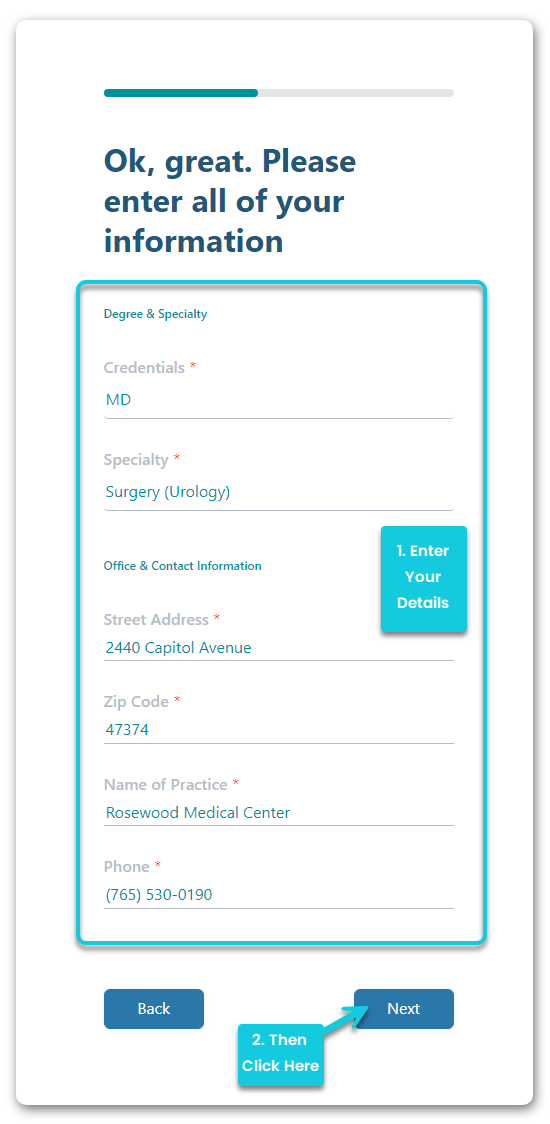
Select the date, and you will get a form to enter details about your degree, specialty, and contact details.
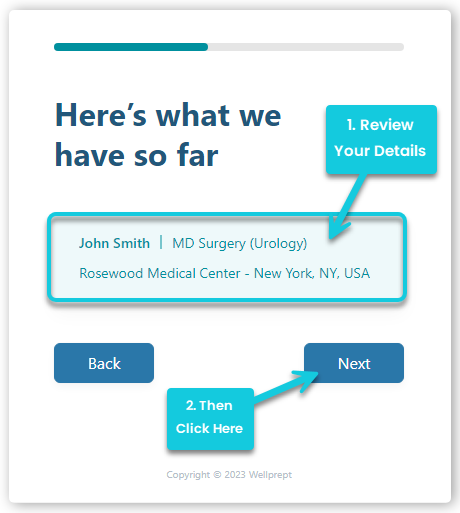
Once you're done adding the specialty and contact information, review them and click Next.
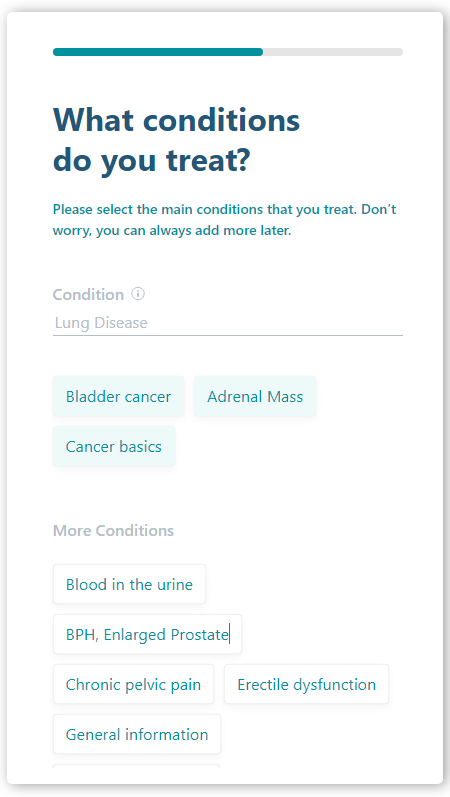
This will open up another onboarding step with a field to specify the conditions you treat. Select the conditions as appropriate and then click Next. You can always add more later if needed.
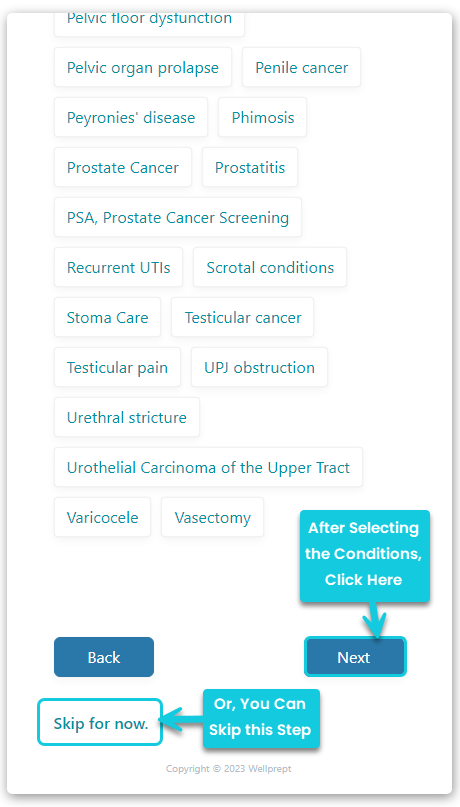
You can also click the Skip for now button to skip this step. Both options will direct you to add a photo.

Click here 👉 Continue After Specialty and Conditions to continue in the onboarding process.
Onboarding as a fully trained provider
For your resident or fellowship status, if you select No, you'll be forwarded to the auto-generated NPI records under your name (if found).
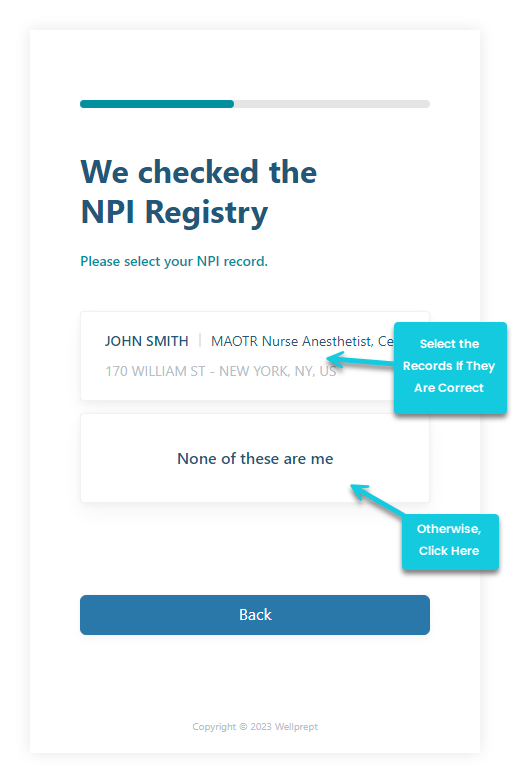
If the records that are generated are correct, select them, and you'll be directed to select your specialty.
If the records aren't yours, click the None of these are me option. It will direct you to a new submission form where you can enter your NPI details.
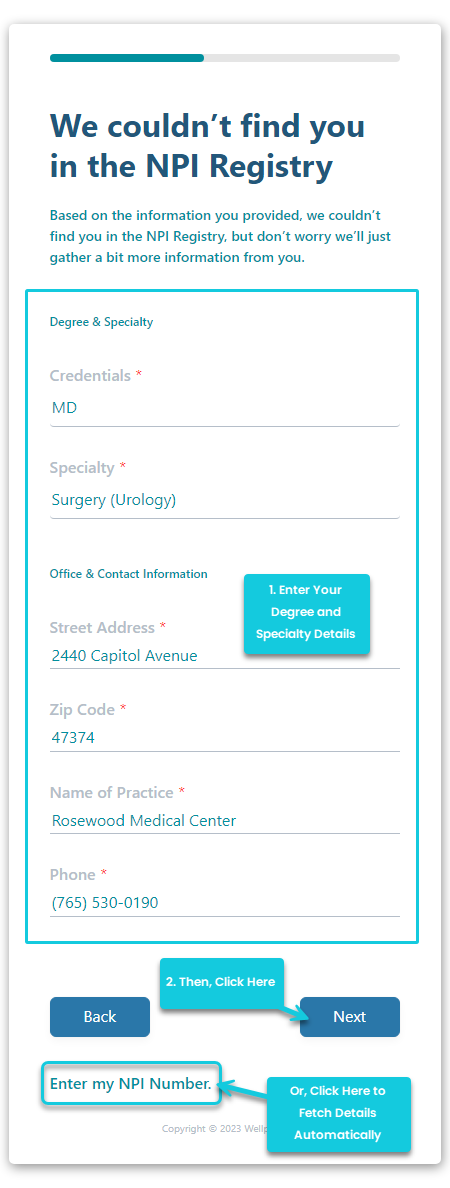
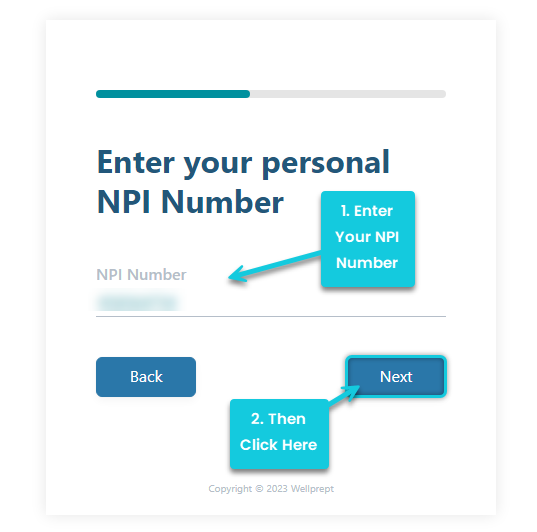
You could enter all the details one by one or use the Enter my NPI Number option to fetch details from the NPI Registry.
After entering the details, you'll be presented with the option to choose the main conditions you treat.
Select as many conditions as you want.
After selecting the conditions, click on the Next button. Or you can choose to skip this step by clicking the Skip for now. Both options will lead you to the next step, where you need to add your photo.
Move to the following section to continue further in the Onboarding process.
Continue After Specialty and Conditions
If our system doesn't have conditions for the specialty you've trained under, then you'll see the following alert with the options:
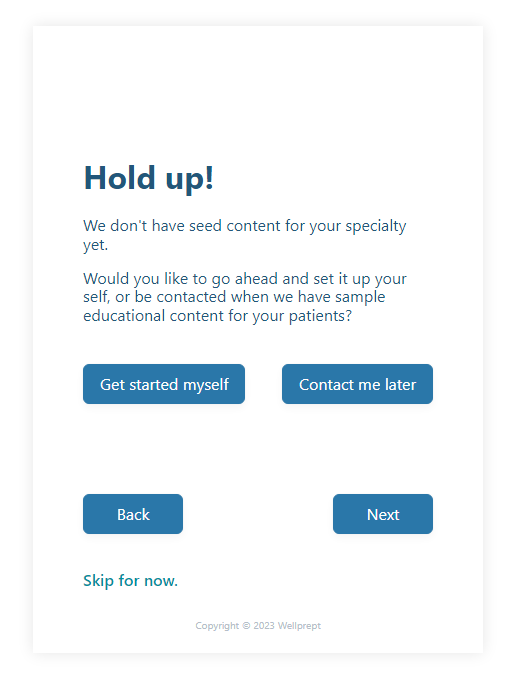
- Get Started myself.
- Contact me later.
The Contact me later option will end your onboarding process, and you will need to wait for an email to be notified once we have the pages for conditions under your specialty. If you don't want to wait to create condition pages on your own, you can click the Get started myself button, which will allow you to add your photo.
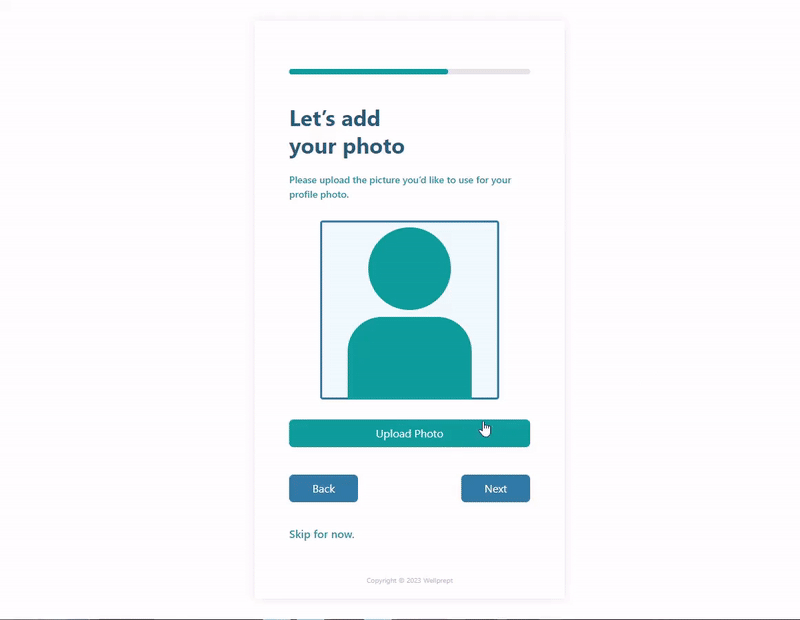
On the adding photo step:
- Click on the Upload Photo button.
- Then, click the Add Photo button.
- After that, browse for the photo you want to use for the WellPrept profile. Select it.
- Then, use the slider to zoom in or out on the photo. Or drag to reposition.
- If you're satisfied with your profile photo, then click Save.

Once the photo is uploaded, you'll see the window above notifying you that your profile has been created on WellPrept. The next step is to confirm your account, and for that, you need to check your email.
Complete Email Verification
To complete the onboarding process, you need to verify your email address. When you finish adding your photo, an email will be sent to your email address.
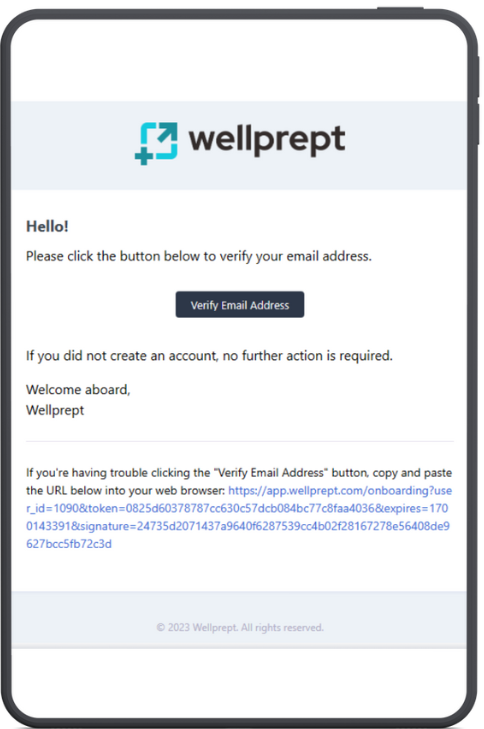
The email contains the button Verify Email Address, which enables you to finish the verification process quickly. If you have trouble using the button, click on the link provided in the email. You'll be redirected to the WellPrept login page.
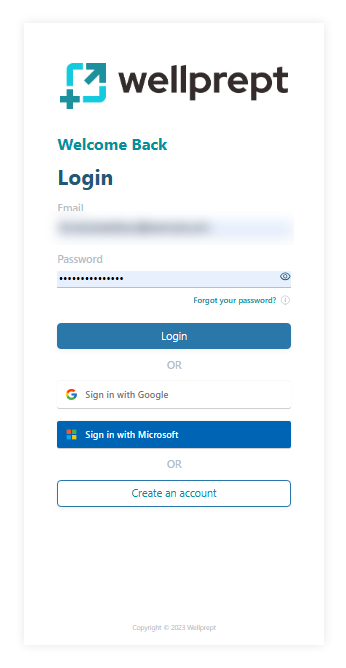
Use your details to log in, and you'll find your WellPrept dashboard as the following.
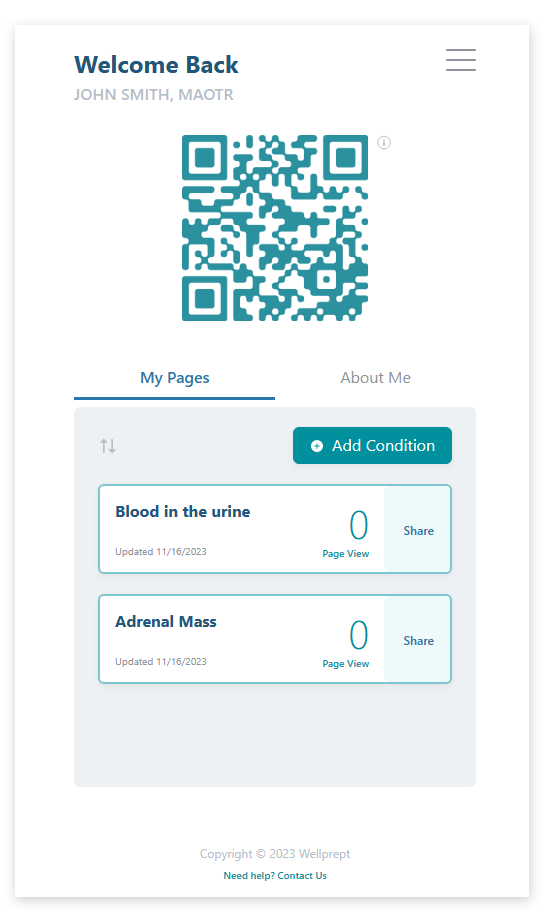
That's it; you've successfully completed the onboarding process. Now, explore the different features of WellPrept and make the most of your clinic day.
You can start by exploring parts of WellPrept.
UP NEXT
EARLIER ON